When you decide you want to get your hands on a smoker, you're going to have to decide to go with either a mass manufactured version or a homemade one. Now if it's shiny, clean lines you're looking for in your smoker, there are A LOT of good manufacturers out there such as Brinkman, Weber, Nordicware, Masterbuilt and Braunfels to name but a few! And all make top-notch smokers! But if a homemade smoker appeals to your inner DIY guru, then you should strongly consider making your own, to that end, I've put together this free simple barrel or oil tank plan!
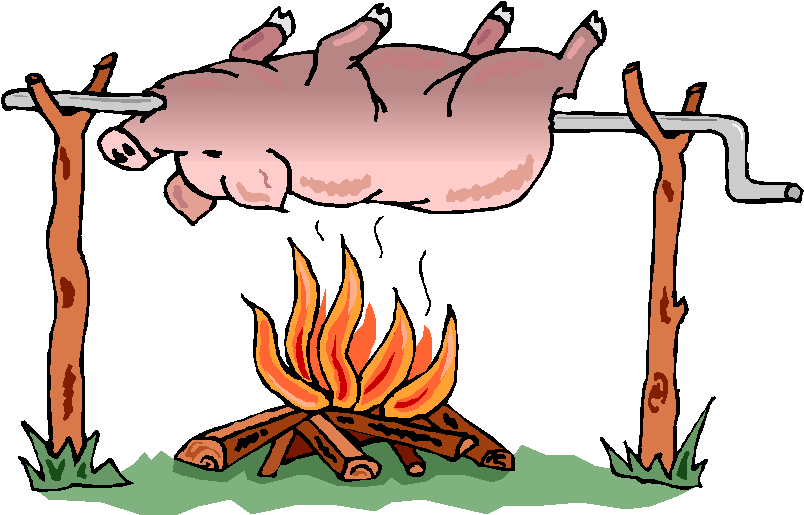
Building your own smoker can be just as straightforward and satisfying as building your own pig roaster or bbq grill. And just like the pig roaster, there are varying degrees of complexity you can go to! Simple modifications to your pig roaster can provide you with something approaching a meat smoker, giving you and all in one roaster and smoker, but in all honesty it's best to start from scratch with a new build for the best results. Before I get into the nitty gritty of how to build your own smoker, just a quick note on smoking as a practice.
The key difference is the level of heat applied to the meat. With your typical bbq grill, the meat is exposed to a much higher heat level; the cooking tends to be faster and more intense. Also the meat will usually be exposed to the open air.
Smoking is a far more subtle process, instead of intense heat for a short period of time, the meat is cooked by the hot gasses and smoke emanating from the fire as they pass by the meat on their way out the chimney. Due to the significantly lower level of radiating heat the meat takes longer to cook allowing tougher cuts of meat to be tenderised. For the smoke and hot gasses to cook the meat, it is enclosed in a chamber, thus stopping the hot smoke and gasses escaping before you've got your moneys worth from them! A key element to the smoker is the chimney, its crucial to have a good throughput of air through the smoker so stale smoke doesn't continue to engulf the meat, this is a typical beginners mistake and will make the meat taste awful, and therein lies the secret to smoking meat, striking the balance between enough good smoke and too much stale smoke!
So why would you bother with smoking meat at all if it takes longer and at the end of it all your meal might taste like a fire fighters boot! Well the upshot of all this smoke is the possibilities it offers in terms of flavours. Smoking meat allows you to infuse the meat with a multitude of flavours, widening the scope of your recipes, all depending on your fuel!
A lot of smoking these days is done with charcoal, probably because its easy to regulate the temperature. However if your willing to go to the extra effort cooking with hardwoods such as cherry, hickory, maple or oak can produce outstanding results.
The Modified Pig Roaster
Getting down to the smoker itself, the first and simplest option is to modify your existing pig roaster (assuming you've built the pig roaster I describe on my home page!) If this is the option you're going with you need to first put in a grate to sit your meat on. This can sit up near the joint (where you cut the drum) in the drum to allow enough space between the grate and the charcoal below. It's best not to use the same extruded metal for the food grate that you used for the fuel grate. It's quite a bit of effort but you're better off making your own food grill from lengths of quarter inch steel rod, welded down to a perimeter steel frame. The perimeter frame can sit just inside the drum just as the fuel grate did. The reason for the extra work here is that the steel rod food grate is a million times easier to clean than the extruded metal fuel grate, important if you're placing meat on it!
The other alteration required to your oil drum pig roaster is the inclusion of a chimney. I use two 2-inch pipes side by side punched into the drum and welded into place. Its important that you install this chimney to one end of the drum, the principle here is to light your charcoal fire at one end of the drum, place the meat in the middle of the drum, and have the chimney at the opposite end of the drum! This creates a nice little convection flow of air into the drum, past the meat and out the chimney, and hey presto, you have a rudimentary smoker, with minimal effort! Oh the last thing you should think about doing is putting a window into the drum, because one thing is certain, every person that walks by your new smoker is going to take it upon themselves to open it up and check how the meat is doing, this will turn a slow smoking process into a never ending smoking process. An old window from a used bbq is pretty easy to fix up.
ADVERTISEMENT
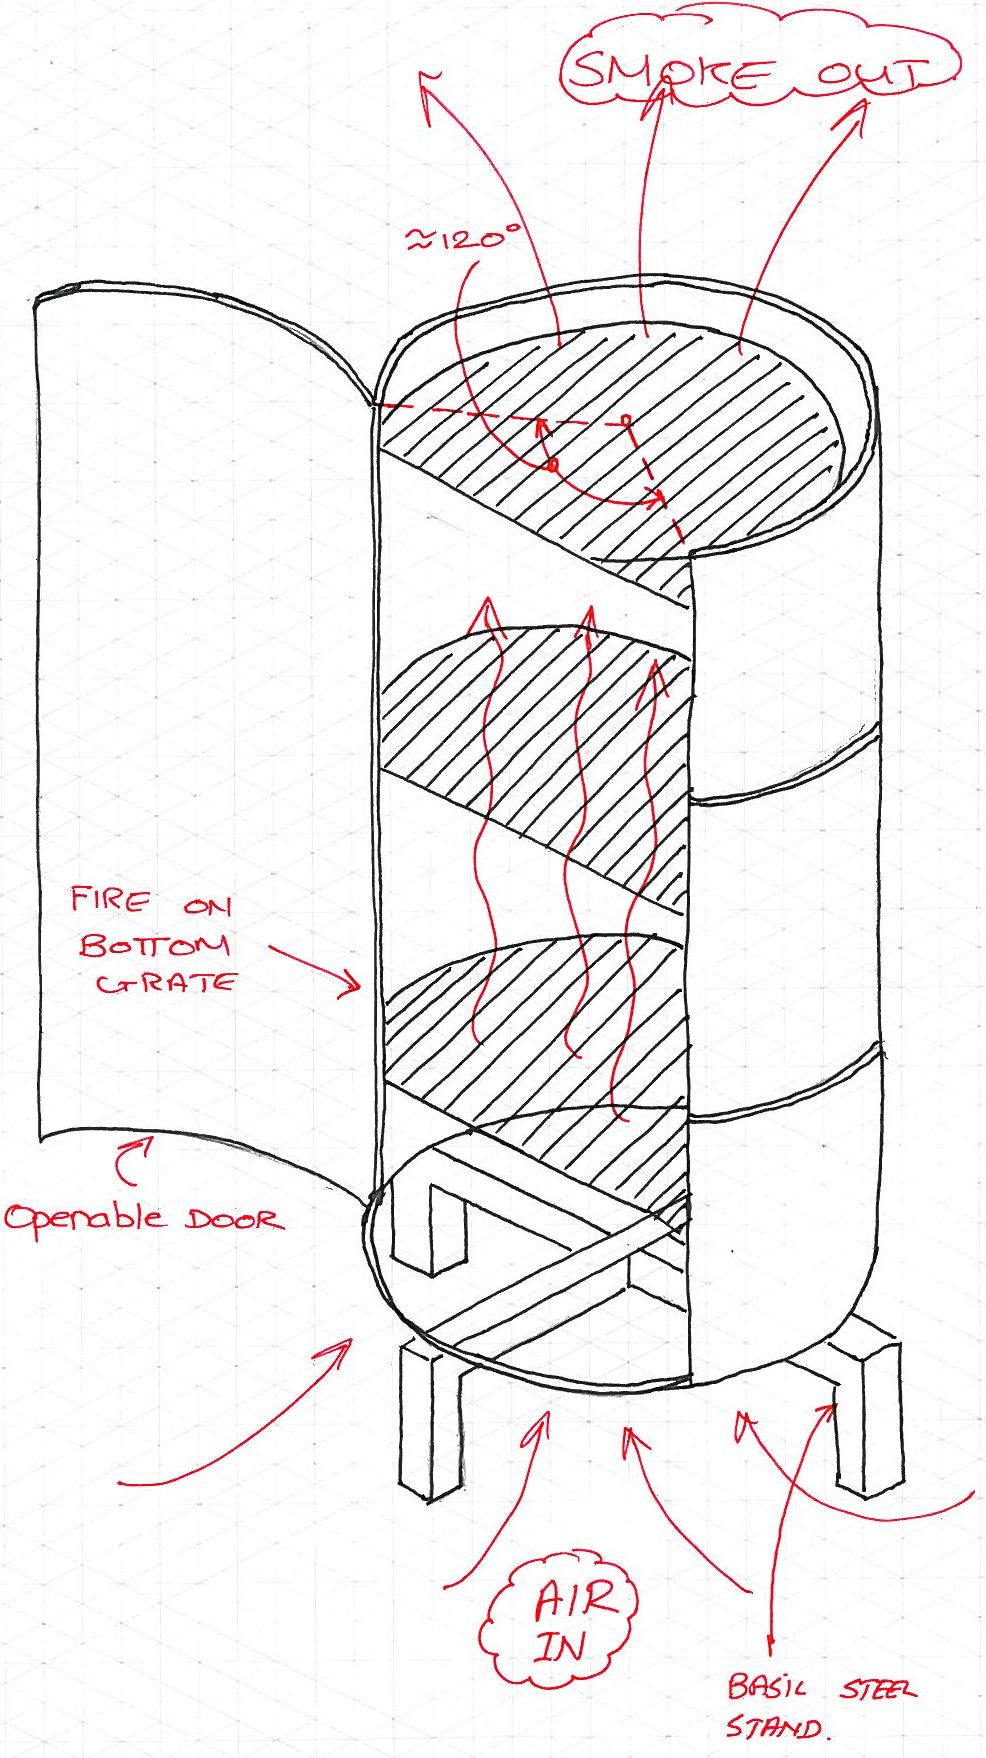
The next level up from modifying your existing roaster is to build a new purpose build smoker. The design I have opted for is the 'Tower' smoker. You start off with a 55-gallon drum again. First cut the two end walls of the drum out so you are left with an open cylinder. Then cut a section of the drum such that it forms a door that will swing open. I find a 120 degree segment is big enough for the door. The big difference from the roaster is that the smoker is positioned on its end. The cut door section is now hinged back onto to drum allowing the front 'door' to swing open and reveal a series of steel grate shelves. The bottom shelf is where the charcoal fire is lit. Now, you have the option of allowing the charcoal smoke to rise up and slowly cook your meat on the higher shelves, or you can position a steel box above the charcoal fire, filled with damp wood chippings. This is the main advantage to this design of smoker, it allows you to experiment with different types of wood chipping thus giving the meat different flavours. You can insert multiple shelves up along the drum meaning a large quantity of meat can be smoked.
This approach is a huge leap forward from the modified pig roaster described first, and well worth the time and effort involved. You should have a pretty good idea of how the construction will go after reading my pig roaster design article. The last element to be constructed is a stand to sit the tower smoker onto. It's crucial that the smoker is raised about eight to twelve inches clear of the ground to allow air to funnel up through it feeding the charcoal fire. The stand is straightforward and shouldn't need any explanation.
Double Chamber Smoker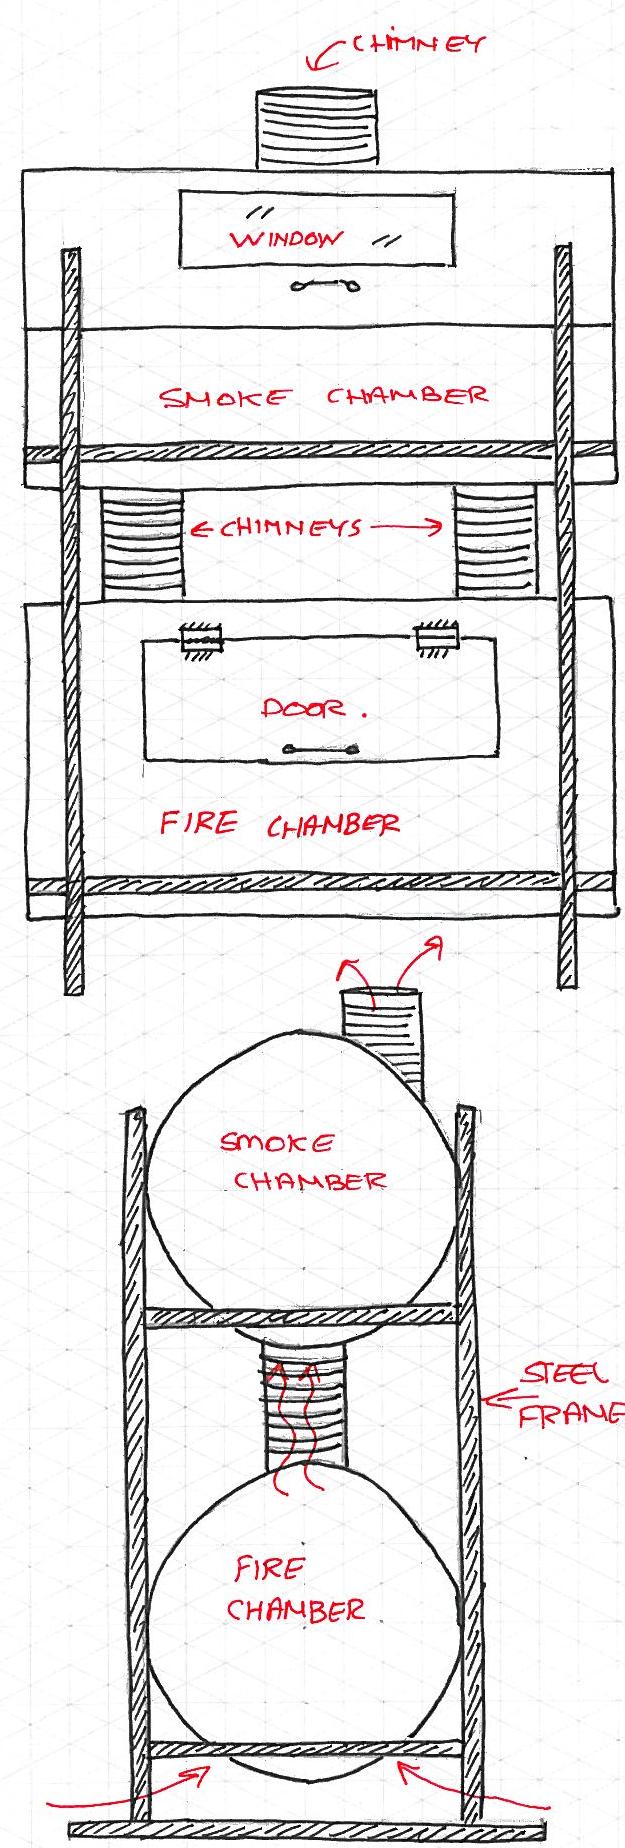
Yet another leap forward in homemade smokers is the multi-chamber smoker. This is the grand daddy of homemade smokers and requires that little bit more effort and planning, but like most things if you put the effort in, the results are pretty impressive!! The idea here is to use two full 55-gallon drums. One mounted in a frame over the other with 2 chimneys joining them. The lower drum is used as the fire chamber while the upper drum is the smoking chamber where the meat is placed.
To achieve the best results possible a double chamber system is the way to go! This approach allows you to get a good fire going, without effecting the meat directly with radiant heat, which is one of the drawbacks if the tower smoker. The double chamber smoker allows you to easily use whatever hardwood you like in the fire chamber without having to worry too much about the temperature of the fire! Make sure and use 2-inch box section for your support frame, as your going to be putting a decent structure together for this system.
That basically covers the three levels of smoker. Obviously the results will improve as the quality of smoker increases, so give it a go, and don't be afraid to experiment with it, take the basic principles I've explained here and see what your own imagination can conjure up! Happy Smoking!!