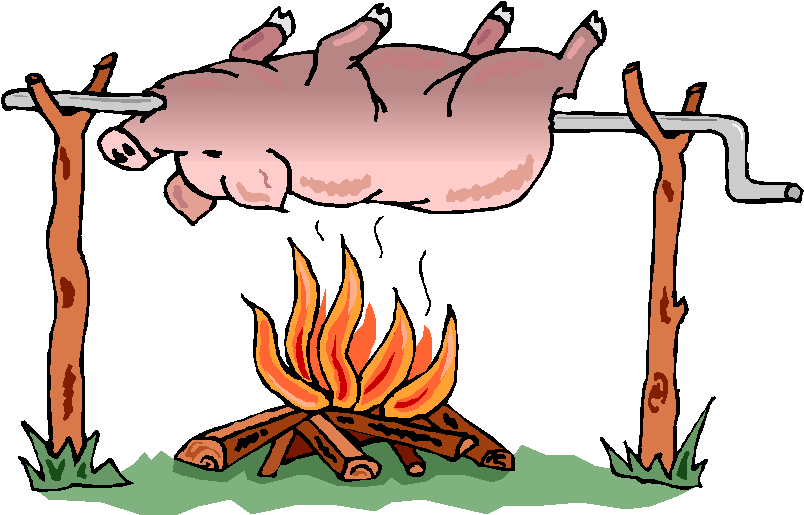
Barbecuing in the back yard on a sunny afternoon with friends and family is definitely one of life's simple but truly sublime pleasures. Very few things beat the feeling that accompanies a carefree lazy afternoon, smoke rising from the BBQ, ice cold beer in hand, and generally just kicking back enjoying the company of friends.
So what's one of the critical elements required to complete this picture? The BBQ! You have many options when deciding to get a BBQ, for those that want to expend minimal effort, the local garden store will usually have some great bbq's for sale, often though, this can work out quite expensive unless you're going to buy the most basic of bbq's. For those that want a bbq with a little more presence in the garden, the brick bbq is a great option. A well designed and constructed brick bbq can be a fantastic addition to the garden that can last for many years, and won't end up rusting away at the end of the garden or clogging up the garden shed.
Opting to design and build your own brick bbq, affords you the freedom to design a bbq to your own size and specification. Like anything that you put your own time and effort into, the pay-off is twofold, along with a functional new bbq, you also get that satisfied feeling every time you use it, knowing that you built it!
ADVERTISEMENTSo getting down to it then, the first thing to say is that bricklaying is a skill, and if it's a house your building then you definitely want to get yourself a skilled bricklayer. HOWEVER, our brick bbq is a much more modest structure, so the good news is that anyone should be able to turn their hand to laying the few courses of brick required for the bbq.
As with any DIY project, you can save yourself a lot of time and effort by doing some careful planning before you get started. You will need to think about the following; where's best to locate the bbq, its worth considering what direction and path the wind typically takes around your garden, because you don't want to end up with smoke blowing back into the house. The bbq should be located reasonably close to the house, as there will likely be a lot of walking back and forth to the kitchen! Your new brick bbq will be with you for quite a while, so spend some time thinking about its layout, and how much grilling and working space you'd like. It's important to get out a pen and paper and sketch out in as much detail as you can the design of your bbq, this helps to develop the overall design as well as estimate the number of bricks required.
Finally, spend a little time deciding what type of brick you're going to use. If your house is faced with brick, an obvious choice would be to choose the same brick as the house. Alternatively, a nice option is to choose older reclaimed bricks. These have a rounded, aged look to them, and tend to vary in colour and texture giving the completed bbq a nice rustic look. It's a good idea to go down to the local builders suppliers and pick up some samples to see how they look in your back yard, seeing the brick in context like this is a great help if your unsure of what brick to choose.
Just a note on the tools you're going to need, the good news is you're likely to have most of these already if you've done a little DIY before. A wheelbarrow and shovel will be used to mix the concrete and mortar. You will need a trowel (the diamond shaped variety) to apply the mortar, this is usually the only extra tool people need to buy to build their own brick bbq. After this, the tools are pretty standard, a spirit level, lump hammer, bolster chisel and measuring tape. A pair of gloves can also be useful when working with mortar as it can be harsh on your hands after a while.
I have provided a sketch, which shows a pretty straightforward design, if you don't want to come up with your own design, just follow the one I have provided. This page from here on describes the construction of my design, but the principles are the same whatever design you come up with.
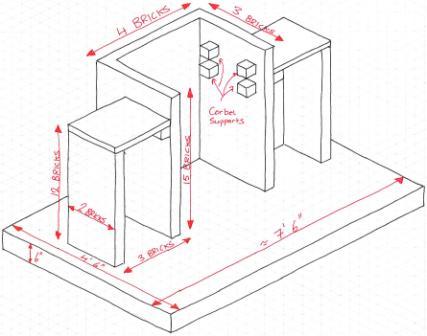
After you've got your design (either mine or your own), sourced your brick, and assembled your tools it's time to get down to it! First things first, the foundation, the foundation consists of a small concrete slab, about 6 inches deep. I recommend making the plan of your foundation bigger than the overall bbq plan area by about 4 inches all around, then adding about 2 feet to the front for the chef to stand on, in my case this makes my foundation 7.5 feet by 4.5 feet.
To construct the foundation, dig out the hole for it to sit in, roughly 6 inches deep. Use some 2x4 around the perimeter of the hole as formwork to give your foundation clean edges. Position the 4-inch high planks at the top of your 6-inch deep hole, then fill with concrete. Mix your concrete in the wheelbarrow, using cement, gravel, builders sand, and water in the following ratio 2:6:4:1. While pouring the foundation you will need to place some steel mesh into it, roughly around the mid depth of the concrete. The lightest structural mesh is fine, this is really just to minimise cracking in the finished slab, you can probably pick this up from the same builders suppliers that you've sourced your bricks from. When you have the foundation poured, level it off by taping the edge of a 2 or 3-foot long length of 2x4 across the surface of the concrete. It's a good idea to create a slight slope in the concrete surface to allow rainwater to run off. Leave the foundation slab to cure for a couple of days before setting to work on the bbq itself.
When your foundation is ready to work on, you can get down to building the bbq itself. A good tip for the first time bricklayer is too lay out the first level or course of brick without mortar first. Do this as accurately as possible allowing about half an inch between bricks for the mortar. When you have this done and you're happy with the dimensions, use a stick of chalk to outline the brick, then when your laying the first course for real with mortar you'll have an outline to follow! This allows you to get the first course spot on without the mess of the mortar.
The mortar is different from the concrete you mixed for the foundation. It consists of cement, builder's sand water and a plasticizer to improve workability. Mix one part cement to six parts sand and add water until the desired consistency is reached. The consistency is similar to a thick honey, the mortar should slide off the trowel in a continuous line but be stiff enough to stand in a pile on the trowel. For plasticizer, squirt a dash of kitchen washing detergent liquid into each wheelbarrow mix.
When your happy with your chalk outline, and wheelbarrow full of mortar, lay out your first bed of mortar, and carefully place the bricks. Apply mortar to the sides of the brick that are butting up against another brick. You're aiming for about a half-inch of mortar between all bricks. It may be worth your while sacrificing a couple of dozen bricks having a practice run. Lay a couple of courses to one side of your foundation (to be removed later) until your happy with your technique.
When you get into laying brick proper, make sure to stager the vertical joints with each course of brick, to do this you'll need to cut brick. Do this using the bolster chisel and lump hammer. Build up course after course following the plan. On the eleventh course, place two bricks on opposite walls of the bbq, perpendicularly to the line of the wall. These act as corbels to support the charcoal tray. The next course is a standard course, on the following course (13th) repeat the process as for the eleventh course and place two corbel bricks to support the grill grate. Cap this centre portion of the bbq off with two further courses, making the centre portion of the structure 15 courses high.
My design allows for a table area or workspace either side of the centre grill area. I like to make these 12 courses high, and finish them off with a patio-paving slab. A hardwood timber also works very well. In the case of a paving slab, this can be mortared down as per the bricks. If you're using a hardwood board, you may consider screwing down into the brick below.
About an hour or two after you've finished laying brick, use a jointing tool to gently shape the mortar joints. This involves, lightly rubbing the joints with the jointing tool (a small section of garden hose or tea spoon work well) so that they take up a concave shape. Finally give the brick surfaces a rub down with a nylon bristle brush to tidy the whole thing up - and your done!!
Give your new brick bbq about a week to set before lighting your first fire in it. As you can see it's a pretty simple process, with a little bit of pre-planning you can develop some great looking brick bbq's.